1Fichier FTP Usage: Step-by-Step Guide
1Fichier is a popular platform for file uploading and sharing. Using FTP (File Transfer Protocol), you can upload large files more quickly and reliably. In this guide, we will explain how to configure and use 1Fichier’s FTP settings step by step.
Contents
1. FTP Upload Modes
1Fichier offers two different processing modes for FTP uploads:
a) Automatic Mode
- Your files are processed and made available for download 5 minutes after the last modification.
- The resume feature does not work in case of a connection loss.
- It is a simpler and faster method.
b) Manual Mode
- After completing the file upload, you must manually click the “Process files” button.
- More resistant to connection interruptions.
- Recommended for large file uploads and unstable internet connections.
2. Selecting a Destination Folder for FTP Uploads
By default, uploaded files are saved in the “Root” directory. If you want to choose a different destination folder:
- In the “Destination folder for FTP uploaded files” section, use the dropdown menu to select a folder.
- Click the “Valider la selection” (Validate selection) button to confirm.
3. Defining FTP Users
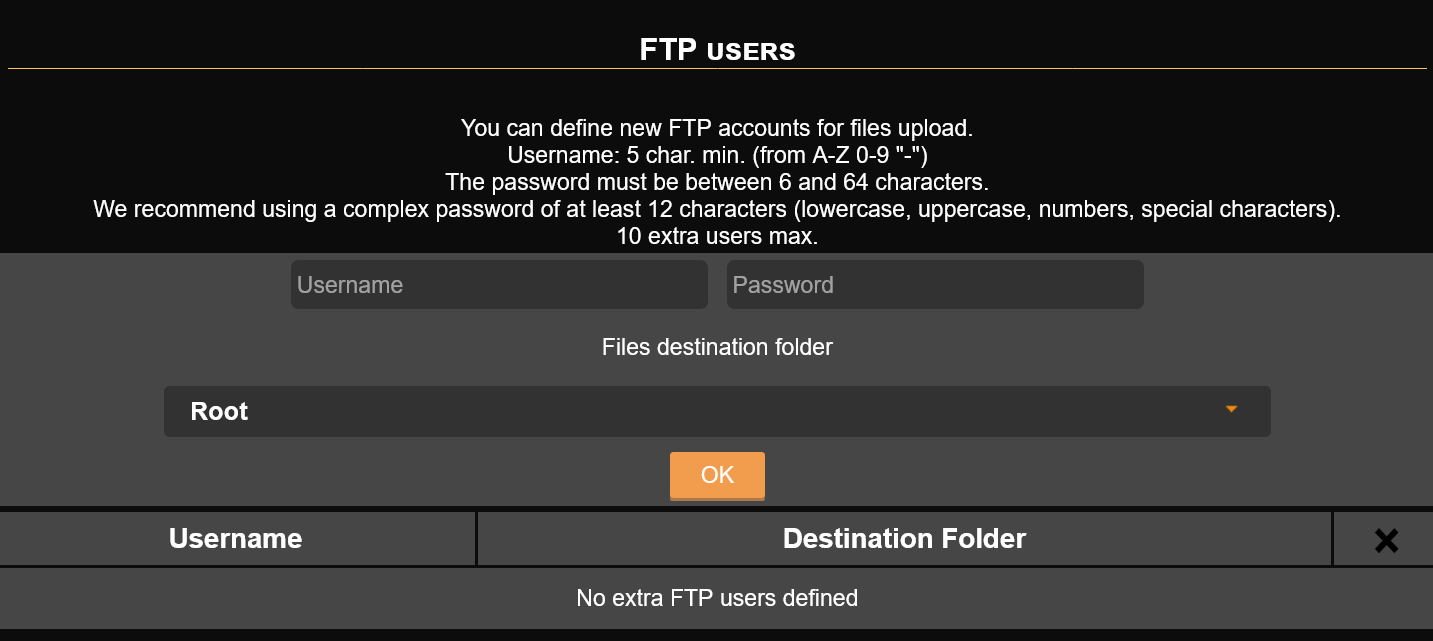
You can create specific FTP user accounts to upload files via FTP.
- Go to the “FTP Users” section.
- Choose a username (Minimum 5 characters, can contain A-Z, 0-9, and ‘-‘).
- Set a password (Between 6 and 64 characters, a complex password of at least 12 characters is recommended).
- Select the target folder for this user.
- Click “OK” to create the user.
Note: You can create up to 10 additional FTP users.
4. Uploading Files via FTP
To establish an FTP connection, you can use an FTP client such as FileZilla or WinSCP.
Required information for connection:
- Host: ftp.1fichier.com
- Username: The FTP username created in your 1Fichier account
- Password: The FTP password you set
- Port: 21
Steps to connect using an FTP client (e.g., FileZilla):
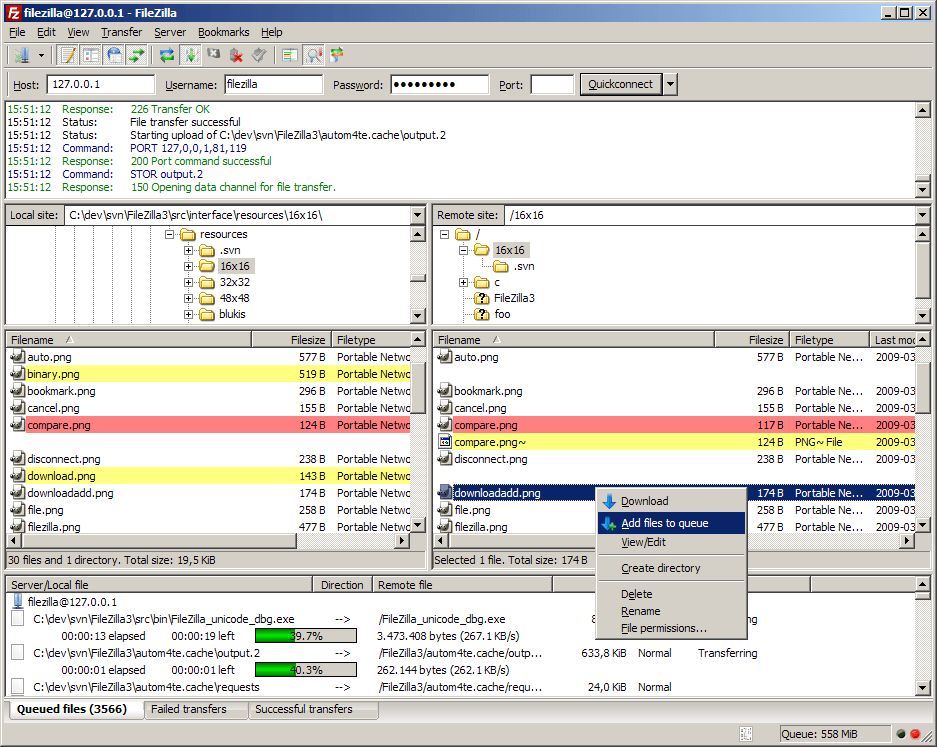
- Download and open FileZilla.
- Enter ftp.1fichier.com in the “Host” field.
- Enter your FTP username in the “Username” field.
- Enter your FTP password in the “Password” field.
- Type 21 in the “Port” field.
- Click “Quickconnect” to establish a connection.
- Once connected, you will see your local files on the left and the 1Fichier FTP directory on the right.
- Drag and drop files to upload them.
Conclusion
In this guide, you have learned how to configure and use 1Fichier FTP for file uploads. Using FTP is a reliable way to manage large files securely. If you have any questions, visit 1Fichier’s support page or check the documentation of your FTP client.